Christmas Inspiration
Create a DIY Lolly Stick Christmas Decoration Featuring Your Photo
This year’s festivities are in full swing, and for those among us who are ready to put our craft skills to the test, we’ve got the perfect DIY to get you in the Christmas spirit. Using a photo print and some lolly sticks, here’s how you can create your own Christmas decoration ready to hang on your tree or to display within your home to be admired. Follow along as we walk you through our easy steps!
1. Gather Your Materials

You’ll need:
- Lolly sticks (or popsicle sticks) - Roughly 10 depending on how big you would like your decoration to be
- An Instant Photo Print – Available to print from a CEWE Photostation at a Boots store near you
- Glue or adhesive tabs
- Some string or twine to use as a hanging loop
- (Optional) Anything else to decorate your lolly stick house!
2. Arrange the Lolly Sticks to Your Desired Shape

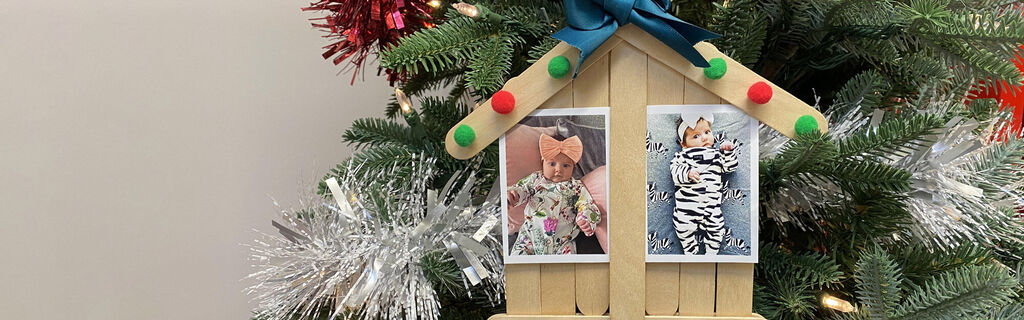
Place the lolly sticks in formation to create a house shape. We shaped them in a ‘V’ style so we could add a slanted rooftop! Make sure the sticks are parallel on each side to create a more professional-looking finish. Secure them with glue or adhesive tabs once you’re happy with the shape.
3. Add Your Photo Print

Place your photo print on top of the base of the house. You might need to trim it to size if it overlaps. We chose an Instant Photo Print with two photos to a page, but you can opt for anything you like – just make sure the photo isn’t obscured when you add the lolly stick over the top to hold it in place! Once you’re happy, secure the lolly stick to the house and leave the photo print free so you can slot it in and out if you would like to change it later.
4. Decorate the Lolly Stick House

Here’s where you can let those creative juices flow! Gather your Christmassy craft materials and add them to the front of the house. No rules apply – feel free to decorate however you like! We went for a bow on top and some festive pom poms to finish off the edges.
5. Add a Loop to Hang Your Decoration

Fix some twine to the top of the reverse side of your lolly stick house so you can easily hang it up. Make sure you secure it well so it won’t fall!
6. Display Your New Creation

Hang your DIY lolly stick Christmas decoration on the tree or in pride of place at home so you can admire your handiwork all through the festive season. Don’t forget, you can change and replace the photo prints inside – why not take a new family photo each Christmas?
Never miss an offer again with the Boots Photo Newsletter
- Latest news and product launches
- Offers
- Competitions
- Inspiration and ideas
Registration Successful
For data protection reasons, you will receive a confirmation e-mail shortly.
Please click the confirmation link in the e-mail to activate your free subscription to our newsletter.
You can, of course, cancel your subscription at any time.
Sorry!
Unfortunately, we were not able to sign you up for our newsletter. Please try again later.


