Christmas Inspiration
DIY Photo Baubles For Christmas
As the Christmas lights start to appear in the streets, Christmas food piles up in supermarkets and you start to wonder where you can fit the turkey in the freezer, it’s time to turn your attention to putting up the Christmas tree!
Whether you’ve had your tree up as soon as Halloween passed, have waited for the first of December or are still holding out for a couple more weeks, we have the ideal activity to mark the occasion - your very own Photo Baubles. Using a pack of Photo Baubles and a selection of your favourite photo prints, add a personalised touch to your christmas tree.

We enlisted the help of Lucy Warner, Lifestyle Photographer and Mum of two boys, Alfie and Hudson, to inspire you to start creating. See how Lucy and her family created their very own set below...
1. Print Your Favourite Photos
To get started, you’ll need to print the photos that you’d like to take centre stage inside the bauble. Whether you order your prints online or pop into your local Boots store (find your nearest store here!), we’d recommend a Standard Photo Print. However, if you would like to add some design elements to your photo such as frames or Clipart, we’d suggest using to a Retro Print.
Top tip: We'd recommended printing two or three photo prints - that way, you will see the image from both sides of the bauble and you'll have one spare.

2. Use the Template To Size Up
Each empty bauble holds two 6.5cm circular photo prints. The set includes a template which can help you shape and size your photos perfectly for each bauble. Simply place the template on your photo and mark around it, then all you need to do is cut around your marking.

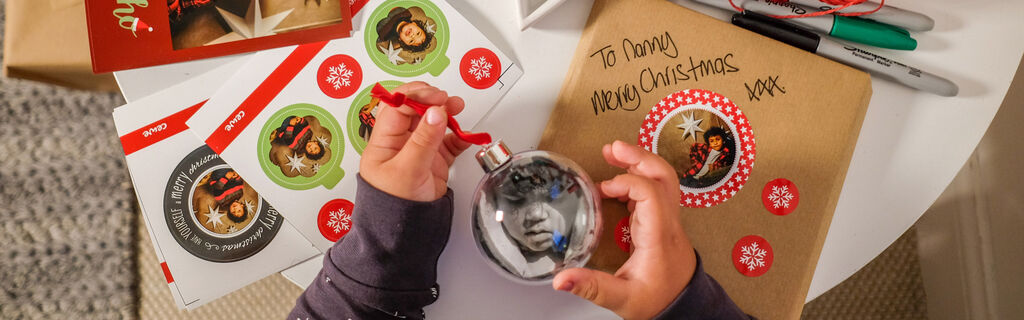
3. Place the Photos Inside The Bauble
Ta da! It’s time to add your trimmed photos inside the bauble. If you are creating with the children, this is a great opportunity for them to decorate the photo too. We’re thinking glitter, stickers and stamps!

4. Re-assemble and Place on the Tree
Now it’s time for your creations to take pride of place on the Christmas tree. If you have made them with love as a gift, simply pop them upright in a box or gift bag and add a few photo prints as a little extra.

The Countdown is On
Now that you’re all set on the decorations, it's time to look forward to Christmas! Sit back and admire your creations as the days pass by until the big event. We hope you loved making a personalised bauble as much as Lucy and the boys did - I think we can all agree they make the cutest addition to your festive interior. Merry Christmas!
1st December 2021
Never miss an offer again with the Boots Photo Newsletter
- Latest news and product launches
- Offers
- Competitions
- Inspiration and ideas
Registration Successful
For data protection reasons, you will receive a confirmation e-mail shortly.
Please click the confirmation link in the e-mail to activate your free subscription to our newsletter.
You can, of course, cancel your subscription at any time.
Sorry!
Unfortunately, we were not able to sign you up for our newsletter. Please try again later.


